A free, browser-based drag-and-drop tool that lets you visualise any room layout to scale, no login, no download, no design skills required.
Furniture Layout Planner
Drag & drop furniture to design your room
Furniture Layout Planner Complete Step-by-Step User Guide
Plan your perfect room layout — free, fast, and no sign-up required.
What is the Furniture Layout Planner?
The Furniture Layout Planner is a free, browser-based drag-and-drop tool that lets you design and visualise any room layout to scale — without needing any design software, interior design experience, or expensive tools. You simply enter your room dimensions, add furniture pieces from the built-in library, and drag them into position to see exactly how everything fits.
Whether you are rearranging a living room, planning a bedroom for a new home, or figuring out whether that large dining table will actually fit, this tool gives you an accurate, visual answer in minutes. Every item is drawn at its real-world size, so you can trust that what you see on screen reflects what will happen in your actual room. Shop budget-friendly home decor items online
The planner runs entirely in your web browser — there is nothing to install, no account to create, and no payment required. It also works on mobile and tablet devices, so you can plan your layout while standing in the room itself.
How to Use the Furniture Layout Planner
Follow these five steps to go from a blank canvas to a finished room layout in just a few minutes.
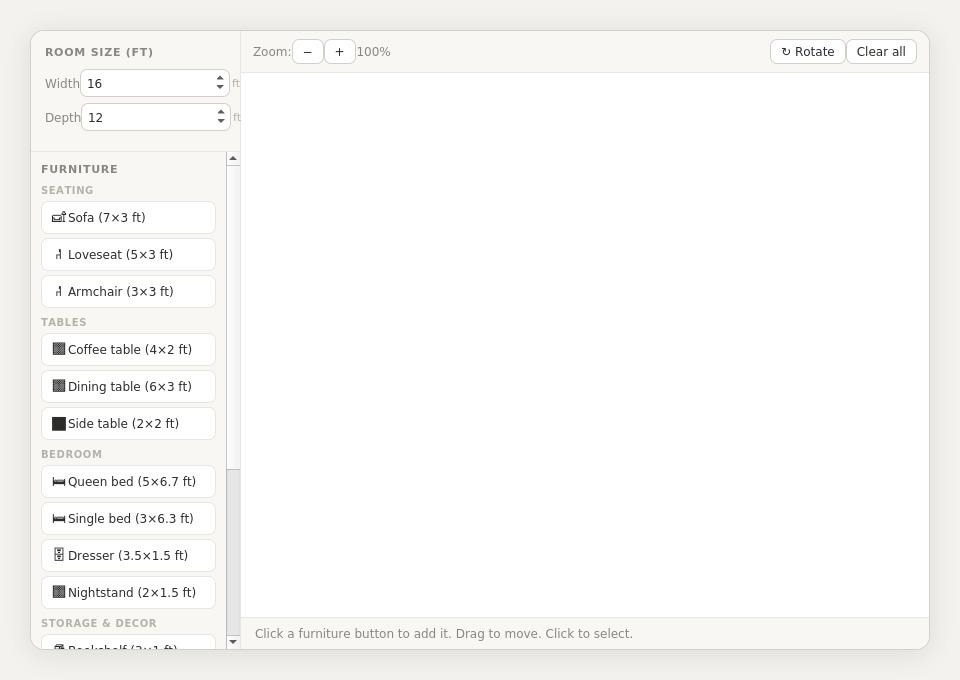
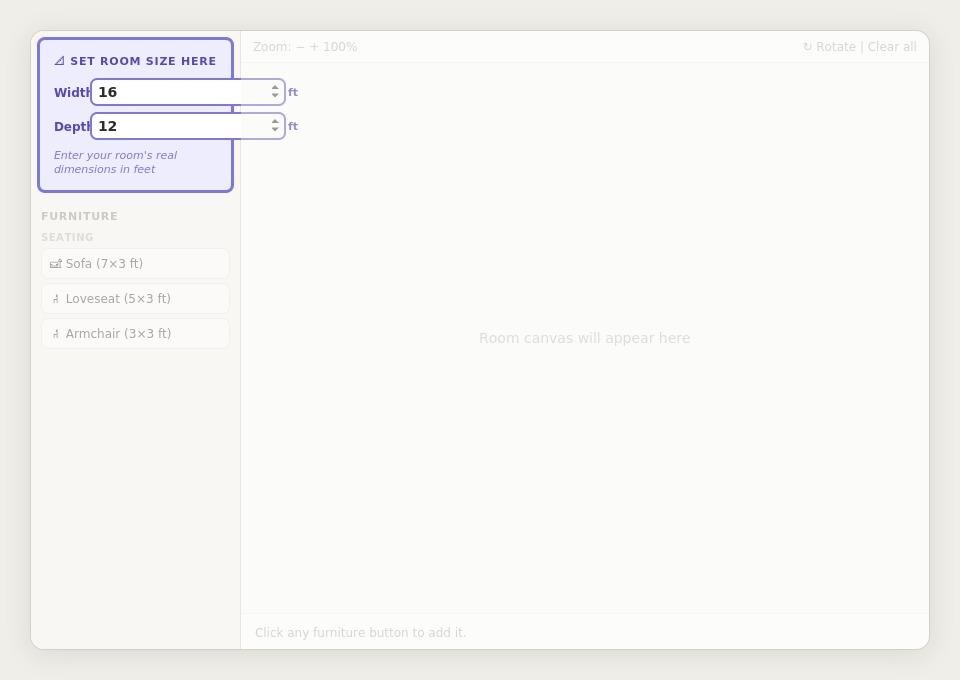
STEP 1 Set Your Room Size
The very first thing to do is tell the planner how big your room is. Look at the top-left panel — you will see two input fields labelled Width and Depth, both measured in feet. Type in the real-world measurements of your room. For example, if your room is 16 feet wide and 12 feet deep, enter 16 in the Width field and 12 in the Depth field.
As soon as you change these values, the room outline on the canvas updates immediately to reflect your actual space. The grid inside the room is drawn at one-foot intervals, so you can easily judge distances and spacing as you work.
Tip: measure your room before you start — a tape measure gives you the most accurate result. The planner accepts any size between 6 and 50 feet in each direction, covering everything from a compact studio bedroom to a large open-plan living area.
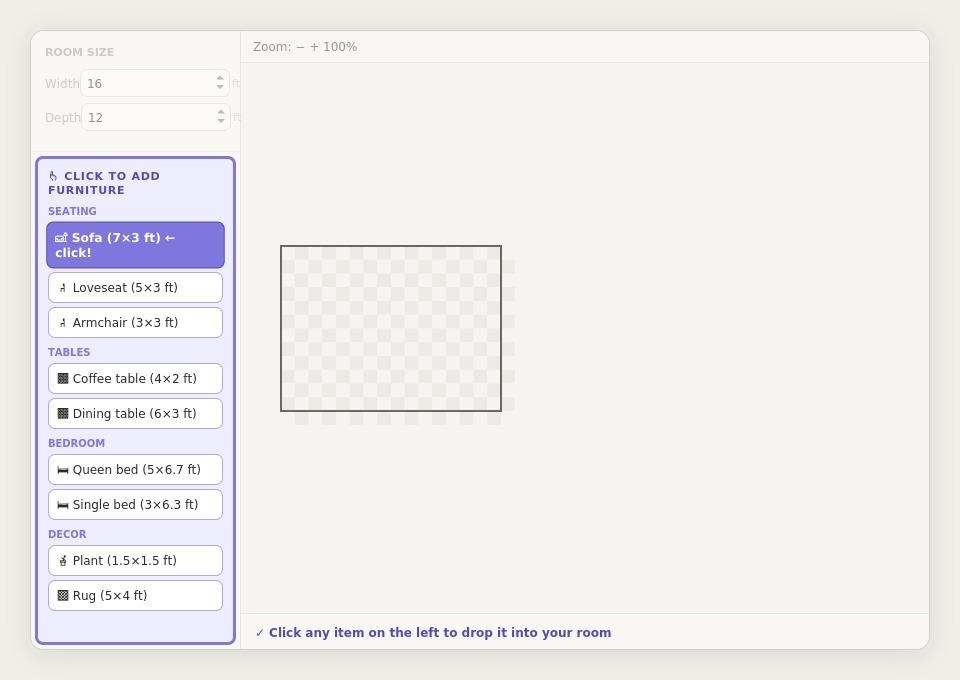
STEP 2 Add Furniture to the Room
With your room size set, you are ready to start adding furniture. Look at the left-hand panel — you will see a scrollable list of 16 furniture pieces organised into four categories: Seating, Tables, Bedroom, and Storage and Decor.
To add any item, simply click its button. The piece will immediately appear in the centre of the room canvas, drawn at its correct scale. For example, clicking "Sofa (7x3 ft)" drops a sofa that takes up exactly 7 feet by 3 feet of your room — you can see at a glance how much floor space it occupies.
You can add as many items as you like, including multiple copies of the same piece. The full furniture library includes:
- Seating: Sofa (7x3 ft), Loveseat (5x3 ft), Armchair (3x3 ft)
- Tables: Coffee table (4x2 ft), Dining table (6x3 ft), Side table (2x2 ft)
- Bedroom: Queen bed (5x6.7 ft), Single bed (3x6.3 ft), Dresser (3.5x1.5 ft), Nightstand (2x1.5 ft)
- Storage and Decor: Bookshelf (3x1 ft), Desk (4x2 ft), Wardrobe (4x2 ft), TV unit (5x1.5 ft), Plant (1.5x1.5 ft), Rug (5x4 ft)
STEP 3 Drag Furniture Into Position
Once a piece of furniture is on the canvas, click and hold it with your mouse (or press and hold with your finger on a touchscreen), then drag it to any position within the room. Release to drop it in place.
The planner automatically keeps every item within the room walls — you cannot accidentally drag a piece outside the boundary. This makes it easy to experiment freely without worrying about invalid layouts.
To move a piece to a precise spot, use the one-foot grid as a guide. The ruler markings along the top and left edges of the room show you the exact position in feet, so you can check walkway widths and clearances accurately. For example, building regulations often recommend at least 3 feet of clearance around a bed and at least 3 feet of walking space around a dining table — the grid makes it easy to verify this at a glance.
On a touchscreen device, the drag gesture works the same way using your finger, making the planner just as usable on a phone or tablet as on a desktop computer.
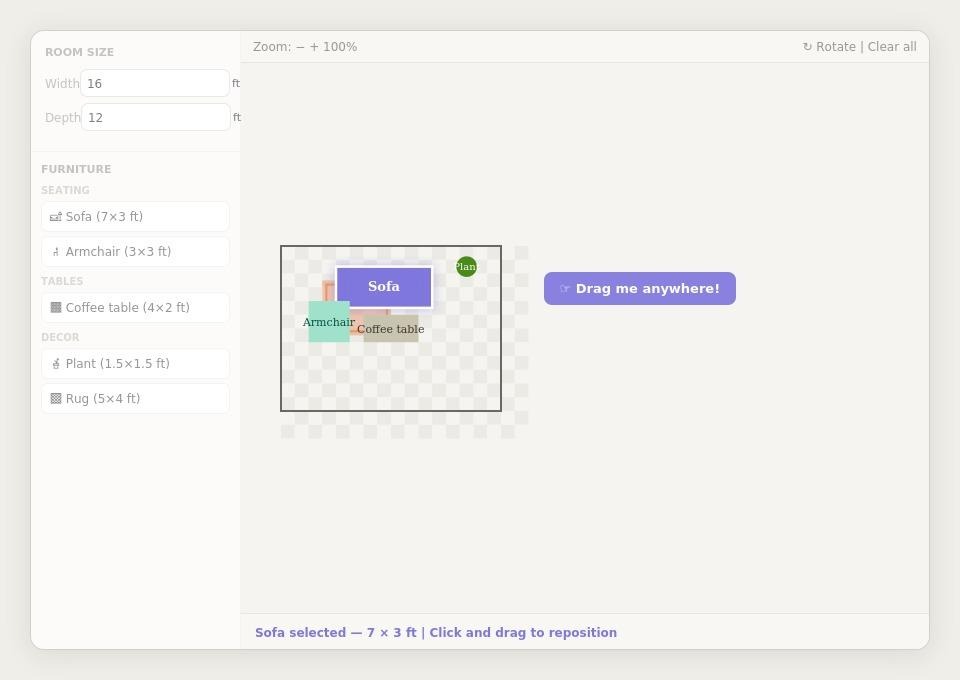
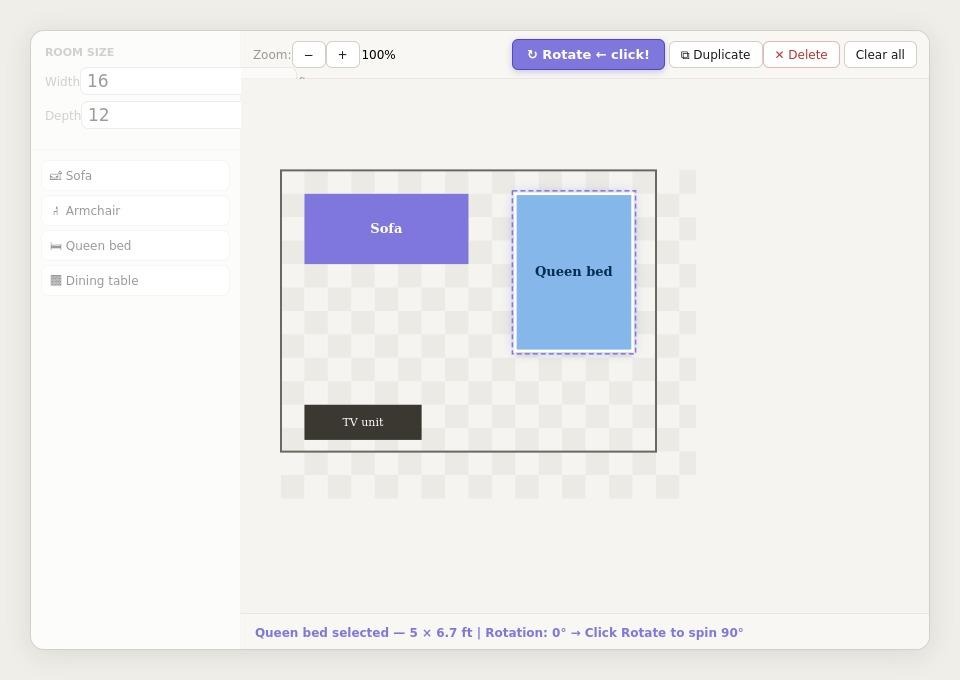
STEP 4 Rotate, Duplicate, or Delete Pieces
Click any furniture piece on the canvas to select it. A dashed purple highlight will appear around the selected item, and the toolbar at the top will activate three action buttons:
- Rotate (the arrow icon): Click this button to rotate the selected piece by 90 degrees. Click it again to rotate another 90 degrees, and so on. This is useful for fitting furniture along different walls — for example, rotating a bed from a horizontal orientation to a vertical one to see which configuration leaves more floor space.
- Duplicate: Creates an exact copy of the selected piece, placed slightly offset from the original. This saves time when you need multiple identical items — for example, two matching nightstands on either side of a bed.
- Delete (the X button): Removes the selected piece from the room entirely. If you want to start fresh, the "Clear all" button in the top-right corner removes every item at once.
The information bar at the bottom of the canvas always shows the name, dimensions, and current rotation of the selected item, so you always know exactly what you have selected.
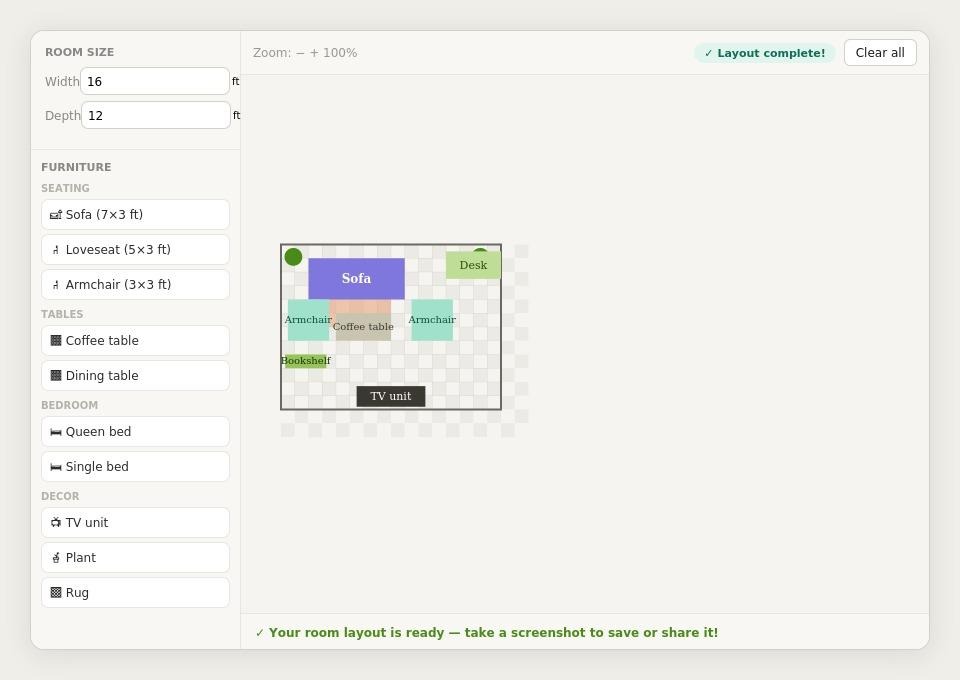
STEP 5 Review and Save Your Layout
Once you are happy with your arrangement, take a moment to review the full layout. Check that there is enough walking space between pieces, that the main furniture is arranged around the room's focal point (such as a TV unit or window), and that the overall flow of the room feels natural.
Use the Zoom buttons (the minus and plus signs in the toolbar) to zoom in and inspect details or zoom out to see the whole room at once. You can continue adjusting — adding, moving, rotating, or removing pieces — until the layout feels exactly right.
When you are satisfied, take a screenshot of the canvas to save your design. You can then share the screenshot with a partner, flatmate, or interior designer, use it as a reference when you physically move your furniture, or attach it to a home renovation brief for a contractor.
Key Benefits
Save time and avoid costly mistakes
Moving heavy furniture is tiring and risks damaging floors and walls. Testing every arrangement digitally first means you only move pieces once — into the position you know works. And if you are planning to buy new furniture, the planner helps you confirm it will fit before you spend money on something that turns out to be too large.
True-to-scale accuracy
Every furniture piece in the library is drawn at its real-world dimensions. The room canvas respects the dimensions you enter. This means the planner gives you an honest picture of how much space each item actually takes up — not an approximate impression.
Works for any room type
The furniture library covers all the main rooms in a home. Use it for a living room, bedroom, home office, dining room, or any combination. The adjustable room size means it works for compact flats and large family homes alike.
No software, no account, no cost
Open the page in any modern web browser and start planning immediately. There is nothing to download, no account to register, and no subscription to pay for. It works in Chrome, Firefox, Safari, and Edge on Windows, Mac, iOS, and Android.
Mobile and touch friendly
The touch drag-and-drop works smoothly on phones and tablets. This means you can stand in the actual room, measure with a tape measure, and plan the layout on your phone at the same time — a highly practical combination when preparing for a move or renovation.
Great for collaboration
A screenshot of your layout is easy to share. Send it in a message to a partner or family member to discuss options together, attach it to an email to an interior designer, or post it in a group chat to get feedback. A visual is always clearer than trying to describe a furniture arrangement in words.
Tips for Getting the Best Results
- Measure your room carefully before you start. Include the position of doors and windows if you want to plan around them.
- Add a rug first and position it where you want the seating area to be centred — this anchors the rest of your layout.
- Try multiple arrangements. It only takes seconds to move a piece, so experiment freely before committing.
- Use the Duplicate button to create symmetrical pairs — two matching armchairs, two bedside tables, or two shelving units, either side of a fireplace.
- Check your walkways. A good rule of thumb is at least 3 feet of clear space for main walkways and at least 18 inches for secondary paths between pieces.
- Zoom in to fine-tune positions and zoom out to check the overall balance of the room.
- Use the Rotate button to try furniture along different walls. Sometimes rotating a sofa 90 degrees completely transforms how spacious a room feels.
Ready to start planning?
Open the Furniture Layout Planner, enter your room size, and start dropping in furniture. Most people have a complete layout planned within five to ten minutes. There is no right or wrong way to use it — just keep experimenting until the room looks and feels exactly the way you want it.